Thick & Creamy Instant Pot Yogurt
“Easy guide to making thick and creamy yogurt in the instant pot! Tips and tricks to create the best yogurt every time!”
Visual learner? Watch me make this thick and creamy instant pot yogurt from start to finish!
Sooooo….I was walking through Target, and an instant pot jumped into my cart! Don’t you hate when that happens? So, of course, I had to buy it, take it home and play with it all week long like a mad scientist.
The verdict? I love it!
So today I want to share with you a recipe I’ve made a total of five times already in my instant pot. Thick and creamy homemade yogurt!
My instant pot comes with a yogurt feature, so that makes it super easy. However, you def don’t need an instant pot to make homemade yogurt. I’ve done it plenty of times before by just sticking the pot in my oven with the pilot light on or my crockpot. More on that in another post!
Why Make Homemade Yogurt?
My husband is always saying ” I’ll just go buy it” when I tell him the steps to making something homemade! There are a lot of benefits to making homemade yogurt. My main one is:
1. CONTROL, CONTROL, CONTROL!! My inner control freak loves being able to control the ingredients. My boys eat yogurt more than anyone in our house, and it’s so hard to find those kid yogurt tubes sweetened with only fruit that actually tastes good. Being able to use local farm-fresh milk and organic fruits is lovely for when I’m feeling super crunchy. It’s also fun to show the kids how to make it. We’ve thrown in several different homeschool science lessons on bacteria, fermentation, culturing and acids using yogurt making. Oh and sure the homemade taste, money-saving, and the soul-feeding joys of turning fresh milk into creamy yogurt are cool too!
OK let’s get right into making this thick and creamy instant pot yogurt! Get excited honey, because chances are, you’ll be hooked! Be sure to read this entire post before starting. It will save you a lot of trouble!

Before You Start: Think Clean!
1. Gather and super clean all of your utensils and things you’ll be using. I give everything a good washing in really hot water, dry them off and keep them on a clean baking sheet, so they don’t get contaminated with anything. Hey, and no sticking your fingers in there!
2. Clean out your instant pot to remove any food odors that may be lingering which will surely rub off into your yogurt! Ick! Some people suggest boiling water in the instant pot first to remove odors but I just use fresh lemon and hot water to eliminate any odors. Also, remove the rubber seal ring on the instant pot lid. That can hold odors as well, and we won’t be needing that to make yogurt anyway.
Choose Your Favorite Yogurt As A “Starter”
T make sure our fresh milk can turn into fresh yogurt we need to add live cultures! You can do this in 3 ways.
1. Get a fresh container of your favorite, NO SUGAR ADDED, PLAIN, yogurt from the store, making sure that it has live cultures. It will usually say something like “live and active cultures” or the ingredients list will mention Lactobacillus bulgaricus and Streptococcus thermophilus. Even though we’re only going to be using a few tablespoons of this yogurt, choose a good one because your yogurt will taste very similar to whatever brand you’re using. I like Fage’ because it’s not a super tart yogurt. In my house, we’re not fans of really tart yogurts. It checks all the boxes! Make sure that is it FRESH yogurt and not one that has been in your fridge for a week.
2. Another way to get live cultures is to use a yogurt starter kit. I’ve never done this, but I see those little yogurt and almond milk starter kits at Walmart all the time.
3. The third way is to merely reserve some of your homemade yogurt if you’ve made it before. You can freeze a few tablespoons so that you are all ready to go whenever you want to make yogurt in the future.
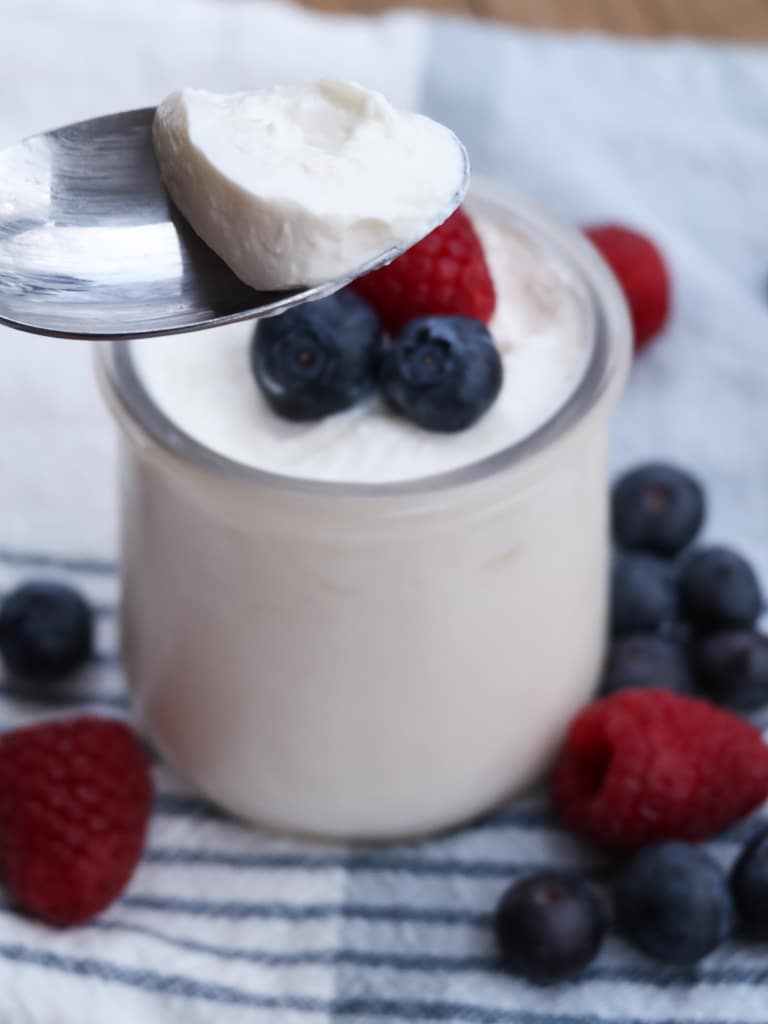
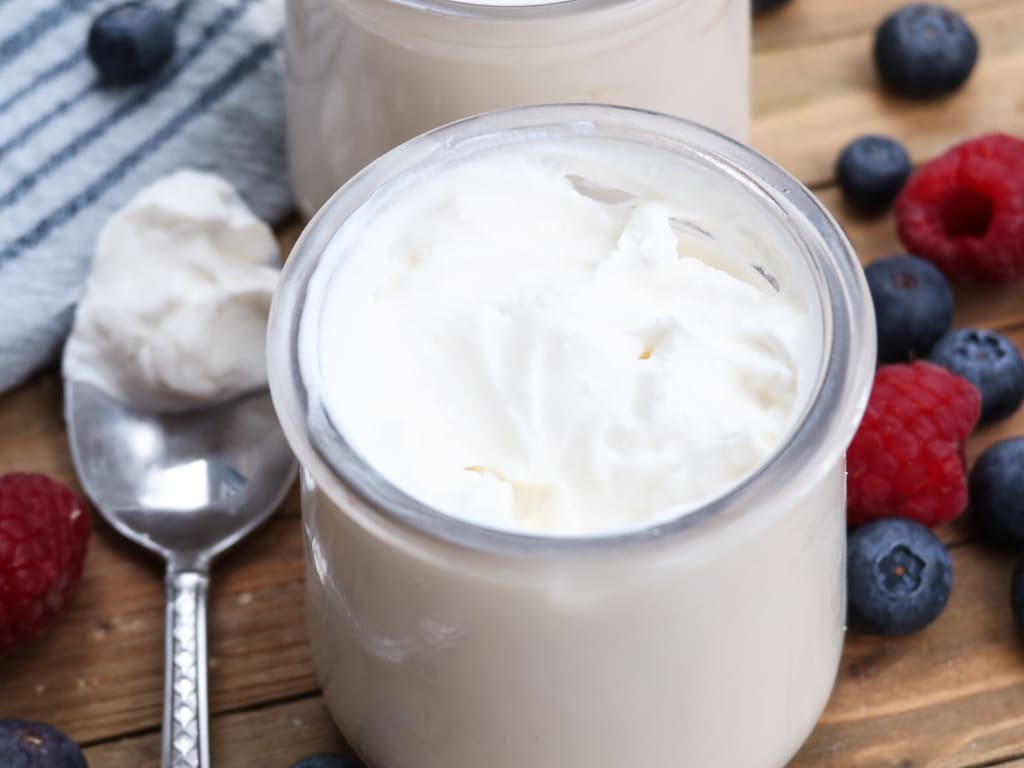
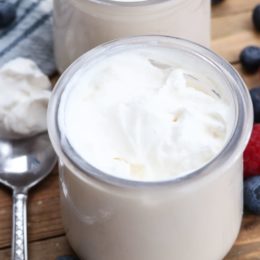
Yogurt Texture: How do you like it?
Homemade Instant Pot yogurt creates a soft and creamy yogurt and once it chills it becomes like the standard yogurt in the store. Which is perfect for what I use it for the most (homemade yogurt tubes for the kids) Bu when eating yogurt plain, I prefer thicker and creamier, Greek-style yogurt. To achieve this texture, let the finished yogurt drain in a cheesecloth, whey strainer, tea towel or nut bag until it reaches your desired texture. ( I prefer the tea towel method hands down! More on that below) You can use the whey that drains off or discard it (more on that below as well). The longer you let it strain, the thicker it becomes so keep an eye on it. I usually do about 1 hour. This creates Greek-style yogurt that is thick and creamy, perfect for my cinnamon granola and berry parfaits! Yums!!!
COOL TIP: On farmcurious.com. It says the secret the perfectly thick yogurt is to hold it at 180 degrees for 30 minutes! I’ve never tried or heard of this, but it’s worth a mention! I’m curious to see if this does indeed produce a thicker yogurt without having to drain it.
How To Make Homemade Yogurt In An Instant Pot
HEAT THE MILK
I like to start my yogurt on the stove top by steaming the milk and slowly bringing it up to 180 F. while stirring regularly. Most Instant Pots with a yogurt feature includes a “boiling” option when you press the “Yogurt” button. This will heat your milk to the right temperate in the instant pot. This takes like an hour, but it’s a great option if you want to set it and forget it. The first time I used this feature my yogurt didn’t turn out as thick so I’ve been kinda nervous to use it again. You can also use the saute feature on your Instant Pot to heat your milk; however, I find it much easier and quicker to heat the milk on the stove. Choose whatever works best for you. Even though my milk is already pasteurized, steaming the milk helps kill off any nasties that could have found their way into the milk.
COOl IT AND SKIM
Once the milk has reached 180 F., remove from heat and let it cool down to about 100-115 F. Some sources say 115 F. is the ideal temperature to cool it to. Mine is usually always 110 F. If the milk is too hot, it will kill the cultures, if it’s too cold it won’t react with the cultures effectively. You can use an ice bath to cool the milk down quicker or just keep stirring to help the milk cool faster. This is what I do. Once cooled, remove the skin that will form on the top. Removing this skin will give your yogurt a smooth, finished texture.
ADD THE STARTER
Remove 1 cup of milk and set aside. To that cup of milk stir in the yogurt until smooth. I always use`1/4 cup of yogurt per every 1/2 gallon of milk, but I think the standard rule is two tablespoons per every half gallon. Stir this yogurt mixture into the sterilized milk and then pour everything into the instant pot. If using packaged yogurt starter, follow the direction on the package.
INCUBATE THE YOGURT
Now it’s time to culture! Place the lid on the instant pot and hit the “Yogurt” button. Select the 8-hour option. There is also a 24-hour option which will produce a tangier yogurt if that’s your thing. The Instant Pot will keep your yogurt cozy and perfectly warm.
GO TO BED
Or go on about your day. I always do this overnight because there is something about waking up to homemade fresh yogurt that makes me feel like I’ve already accomplished something.
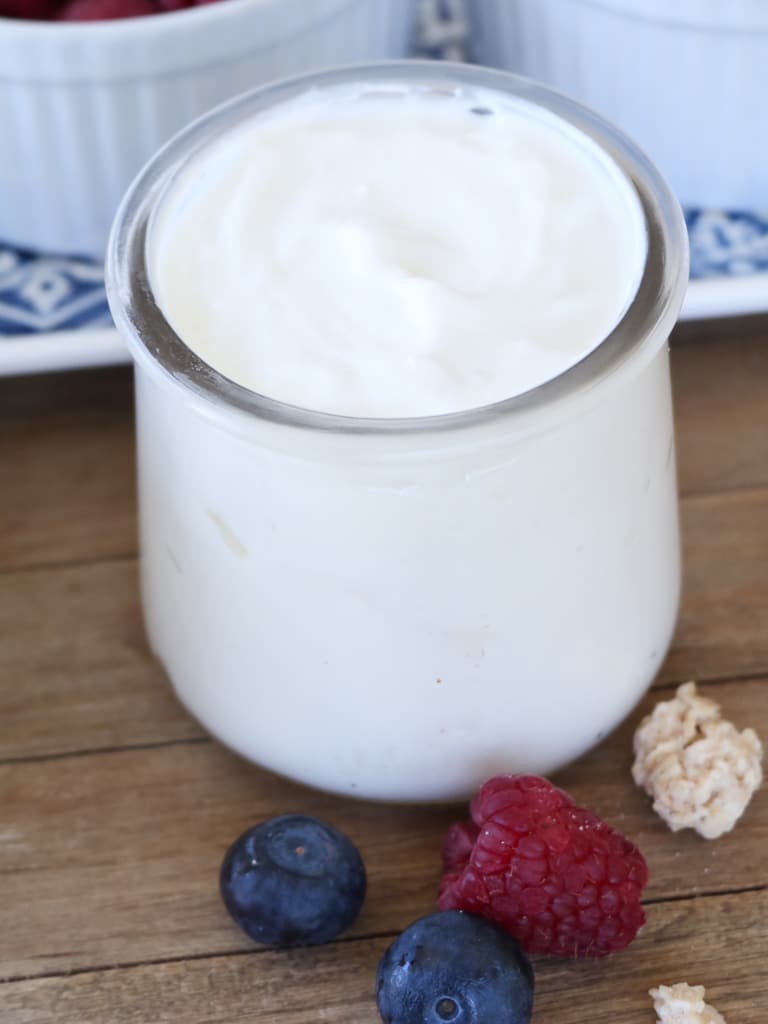
CHILL & SWEETEN, STRAIN
Your yogurt is done when it jiggles and pulls away from the side of the pot. Now that you have a batch of pure, fresh, homemade yogurt the world is yours! Refrigerate it until it’s cold before eating. You can sweeten it to your liking, make yogurt tubes, or create different flavors. I like to keep my batch 100% plain and then add whatever I want on a case by case basis! Normally I just throw in some homemade fruit preserves ( heat berries/fruit with sugar, mash and cook until syrup).
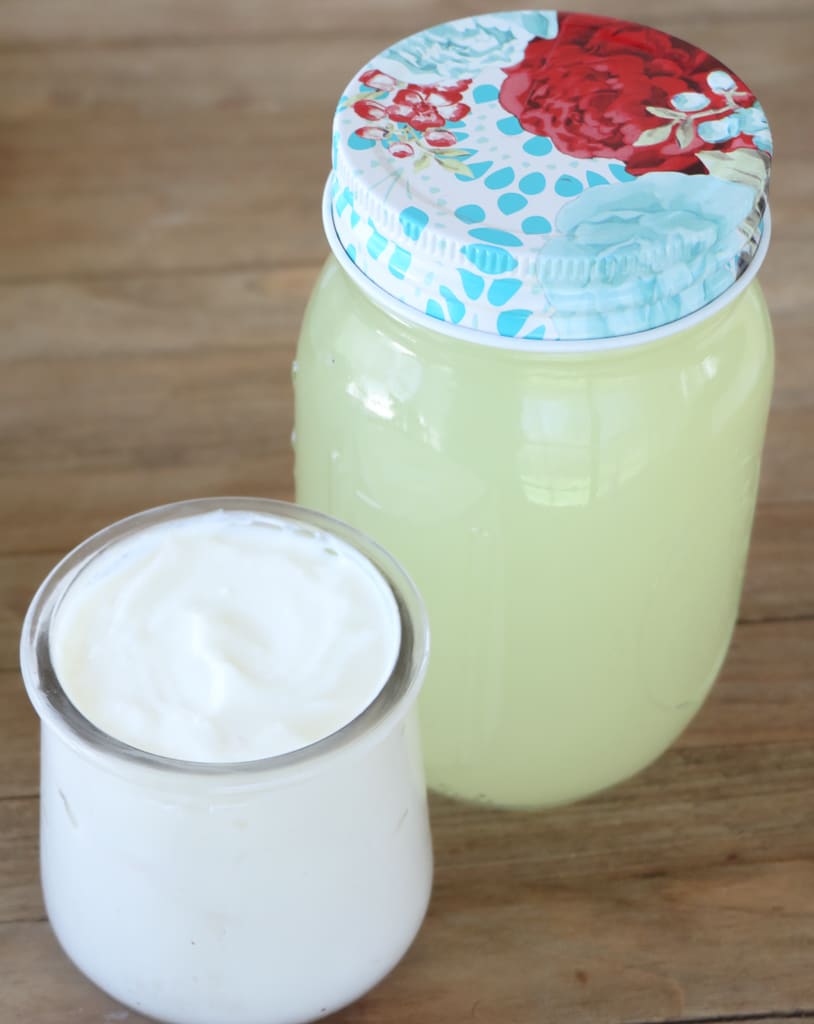
If you want to strain it for a thicker texture: place a tea towel over a pitcher and pour/spoon the yogurt in. Go slowly so the towel won’t drop into the pitcher. This method is old fashioned and can be messy, but I’ve tried the nut milk bags and fancy whey removers and they both still allowed yogurt to become mixed with the whey. The tea towel method removed clear, yellow-tinted whey, ensuring that all of the yogurt stays where it should.
If you’ve tried another way and was successful please let me know!
What to do with the whey?
If you chose to strain your yogurt over a pot or pitcher, you’ll be left with lots of liquid whey that has dripped off. This tart liquid whey is full of whey protein and probiotics. You can google how people are using it such as adding it into smoothies, using in its place of water for cooking, drinking it plain, etc. but wanna know how I like to use it? On my face and hair! Whey protein is in soooo many beauty products these days. Whey increases collagen production (or so they say) and is one of the best anti-aging hits out there. I add it to my homemade shampoos, baths and face masks. It makes my skin super soft and glowy. I’ve also read it can be used as a hair gel. I currently make my how flaxseed gel but I’m so ready to try this out.
Instant Pot Yogurt Troubleshooting:
My Instant Pot Yogurt Didn’t Set…..
So far this is the ONLY issue (knocks on wood) I’ve ever had with homemade yogurt and it’s only occurred three times and only once with my instant pot. When it occurred in my instant pot it happened when I used the “boil” setting. Not saying that the boil setting is the issue, clearly that’s what it’s for and lots of people use it successfully. Usually, yogurt doesn’t set if the temperatures are off. A well-functioning thermometer will be your best friend when making homemade yogurt. It’s critical to get the milk to 180 F. and let it cool to 100-115 F. The temperature also need to be maintained at 110-115 F as the yogurt ferments. Usually, the instant pot does this perfectly. If you used raw milk, the yogurt will naturally be a bit thinner.
My Instant Pot Yogurt Is Lumpy/Separated…..
This can occur if the yogurt fermented for too long or the heat was too high. Strain it to remove some of the whey and mix it and see if that helps. Using a old started can also be the cause of lumpy yogurt.
My Instant Pot Yogurt Is Foamy and Smells Like Bread…
Chances are some yeast got in there. This is why it’s important to keep everything sanitized while making yogurt. Even just placing the whisk on the counter or sticking your fingers in the milk can introduce yeast and unwanted bacteria into your yogurt.
QUICK RECAP:
- Make sure everything you’ll be using to make your yogurt is sanitized and that your instant pot has been thoroughly cleaned to remove food odors.
- Be sure to heat the milk to 180 F. and let it cool down to 100-115 F. (Mine is usually at 110 F. Some sources says 115 F is ideal0
- Use your favorite no-sugar-added, plain, yogurt as a “starter” making sure it has live culture.
- Strain the yogurt for a thicker, Greek-style texture.
And that’s it! You are all set to make homemade yogurt in your instant pot! I know this post was long and may seem like a lot of information, but once you’ve made your first batch of homemade yogurt, you’ll know the ins and outs quickly.
Get the Recipe: Thick Creamy Instant Pot Yogurt
Ingredients
- 1/2 gallon whole milk
- 1/4 cup yogurt, plain, no sugar added WITH live cultures
Instructions
- Make sure all utensils and pots are sanitized.
- In a large pot, add milk.
- Slowly heat until milk reaches 180 F.
- Remove from heat and let the milk cool to 100-115 F. (Mine is usually 110 F.)
- Place 1 cup of the milk in a bowl and stir in the yogurt until smooth.
- Pour yogurt mixture into the milk.
- Pour everything into your instant pot.
- Press the "yogurt" setting and select the "8 hours" option. (select 24 hours for tangier yogurt)
- Place the lid on and let the yogurt incubate for 8 hours.
- Once the yogurt is ready, place it into a container and chill until ready to eat.
- You can also strain the yogurt in cheesecloth or a tea towel for a thicker texture.
- Use plain or sweeten with sugar, honey, fruits, or preserves.
Video
Notes
2. Be sure to heat the milk to 180 F. and let it cool down to 100-115 F.
3. Use your favorite no-sugar-added, plain, yogurt as a "starter" making sure it has live culture.
4. Strain the yogurt for a thicker, Greek-style texture.
Sources: FarmCurious,Epicurious


Thanks for the recipe. What do you use for yogurt tubes?
Excellent presentation and recipe. I appreciate the way you share your recipes and information. You’re amazing!
Really good recipe. I have never made yogurt before this. It turned out perfect. I just strained to thicken, sweetened and the yogurt taste so fresh and light. I really had fun making it.
Thanks for the recipe…
When I want my yogurt thicker, I will line a strainer with a double layer of coffee filters, pour my yogurt in and put the strainer in a bowl to catch what.
Whey not what
I have been making yogurt for a couple years now in the IP. I make it all the time. After my first time starting yogurt I used yogurt from the store as the culture but after that I save some of the whey and use the whey as a starter and have been doing it since I started making yogurt. I freeze 6 cubes in the large king size silicone cube trays. Once they are gone I make new. As for straining the yogurt, instead of using cheesecloth I invested in a yogurt strainer you can get on Amazon. Easier in my opinion. I have 3 of them. I go 17 hours for yogurt since that’s how I like it and strain for a day or so to make really thick yogurt. I let mine get up to 185F. Once yogurt is done, if it doesn’t reach that level I will saute for a couple of minutes. I let mine cool down to 95F and no higher than 110F then temper the starter before adding back into the pot. These are just some of my tips.
i have an electric pleasure cooker, is that the same as an instant pot?
you said to use plain yogurt with live culture, do the super markets sells it?